Ombre, Ombre! Reviving the Paint Effect with Dulux
As a child of the 80’s, I have fond memories of my Mother’s attempts at rag rolling, sponging and generally paint-effecting her way around our house, with varying degrees of success. Naturally, I was keen to chip in, proudly stencilling doorframes and stippling away on a storage unit for my cassette tapes (Google them, kids). The exotic allure of scumbleglaze and the like was swiftly shunted aside in the noughties, however, as pared-back ‘shabby chic’ became the technique du jour, with its soothing off-white palette and faux-French-chateau styling. Until now. Ladies and gents, I give you: the paint effect, 2013-stylee.
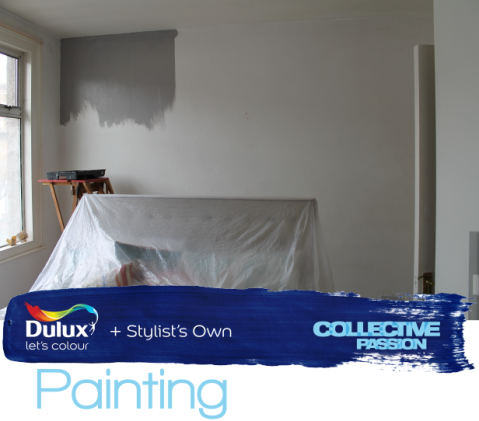
So here she is – ain’t she a beaut? One of the key components of Dulux’s SS13 Collective Passions trend, the technique is inspired by the way we swoosh and swoop our way from one new idea to the next, flocking together to share and flying off just as quickly. Hence being named ‘flocking’, though technically it’s more a dry brush feathering technique to create an ombre colour-fade effect. These pictures are of Dulux’s own staff cafe in Slough, created by their talented Creative Director, Marianne Schillingford. Inspired, I decided to have a go myself at home, which most aptly now forms my first post in a week of Dulux discovery. And here’s how I did it:
Work out where you want your colours to meet, and draw a pencil line along your wall – this will help the clarity of the finished effect (though if you want to go all-out maverick, then head straight to Step Two). Think about what is going against that wall – do you want to directly line up with any furniture items in the room? As this wall has my bedhead in the middle of it, I wanted the line to fall slightly below this. Also worth a note at this point – if you’re planning on painting any other connecting walls in the room (with this effect or otherwise), might I suggest doing this afterwards – I got rather overzealous with my technique and repeatedly covered the surrounding walls with blue swashes, which I was mighty glad I hadn’t yet decorated.
Working from the top down, paint your first colour – I went for the warm greyish-mushroom tones of Flying Feather, to allow my lower colour to really pop out, but if you want a more subtle effect, stick to similar shades. When you reach your paint line, roughly paint over it, allowing the paint to feather off.
Then, starting from the bottom, work your way upwards with your second colour (try to avoid joining up the colours until the upper wall is dry). When you reach the upper wall, work the paint over its rough line very loosely with an almost-dry brush, brandishing it from side to side as well as diagonally – image you are sword fighting an imaginary interiors nemesis over the battle of Best Painted Wall (should I have said that aloud?) The key here is not to over-think things and avoid being too heavy-handed (and to cover all nearby furniture/children/pets with protective sheeting). Don’t worry if it looks a bit, erm, crap at this stage – the magic hasn’t quite happened yet…
Once you’ve joined both colours together, go back over the line with the top colour (if you’ve kept your strokes light the wall should already be dry) and blend the brushstrokes together. Go back again with the lower colour and keep working over the wall, alternating between the two until you’re happy with the end result (I went over the wall at least eight times with both colours and would probably still be doing it now if the boyf hadn’t insisted I down tools). But fear not, it doesn’t actually take that long – I probably spent about 45 minutes on this bit, in addition to the actual wall painting, and the whole job was done in an afternoon. Again, the key is to keep your strokes as light as possible and allow the colours to dry-blend slightly to stop it looking so harsh. Don’t forget to stand back and look at the bigger picture as you go, rather than stand squinting in extreme close-up at the bit that’s going to be covered by furniture anyway whilst scratching your head in self-doubt.
So how did it all turn out?
Well, rather nicely I think! I’ve sneakily abandoned my mid-renovation bathroom to do this – the bedroom was next on the to-do renovation list – and I wasn’t sure quite what I wanted to do in here other than I liked the idea of something interesting happening on this wall, but I didn’t really want to wallpaper it. I plan to expand the artwork currently on the wall (more on these artworks later but they have all been Dulux’ed – will reveal what I did shortly!) and I’m also planning on painting the rest of the room with Flying Feather to tie it all together.
So what do you think – tempted to try it yourself, or think it looks like I’ve had some kind of mini-meltdown during a DIY session?!
{Images: Photography copyright Joanna Thornhill. Top of wall, painted in Flying Feather, bottom of wall painted in Sapphire Springs 3 (both matt finish), skirting board painted in Fragrant Cloud 4 (eggshell for wood), all Dulux TailorMade}
Psst: wondering why I’m blathering on about Dulux all week? Well, I’m working on an exciting online collaboration with them, exploring their latest SS13 trend, Collective Passions. All week I will be producing blog posts with this trend as the starting point, and then on Saturday 9th March I will be presenting my findings at Meet the Blogger London. To find out more about both, click here.
7 responses to “Ombre, Ombre! Reviving the Paint Effect with Dulux”
Trackbacks / Pingbacks
- - March 4, 2013
- - March 6, 2013
- - March 8, 2013
- - March 16, 2013


I have to admit to bring totally skeptical when I started reading this post but I was completely sold when I saw the finished shots. Definitively considering having a go myself now!
Apologies for the embarrassing typos in my previous comment. They reveal the current state of my brain…
Ha, typo’s forgiven! You should totally do it – if you try it on a small wall or alcove it won’t take too long, or test the waters with a canvas. I did think to myself that it’d be a good technique for a kid’s room mural actually – with green ‘grass’ along the bottom using a slightly more upright , less blended brush technique, then some nice soft clouds/sun etc. Food for thought! I do really like it though, it’s grown on me lots x